Since it's July 2 today, it's about time to start working on your Fourth of July manicure ideas. Today I'm bringing you the tutorial for what I was able to come up with. I wanted to go all-out with this one since you only get one chance to do a Fourth of July mani/pedi every year.
Supplies:
You will need a top coat and base coat, red, white, blue, and silver nail polish, a striping brush, a dotting tool, and chevron stickers. You can also use a sparkly silver top coat, cuticle oil to moisturize after you're done, and acetone with a brush for cleanup. I used Essie top and base coats, and the Julep colors Brigitte, Bailey, Jackie, Rebel, and Joelle.
Toes:
For my toes I kept it pretty simple. I started with a base coat (Essie Millionails) and used the red polish (Jackie) on my small toes and the blue polish (Bailey) on my big toes. Then I used my striping brush to draw stars on the big toes with my silver polish (Rebel.) Then I finished with a top coat (Essie No Chips Ahead.)
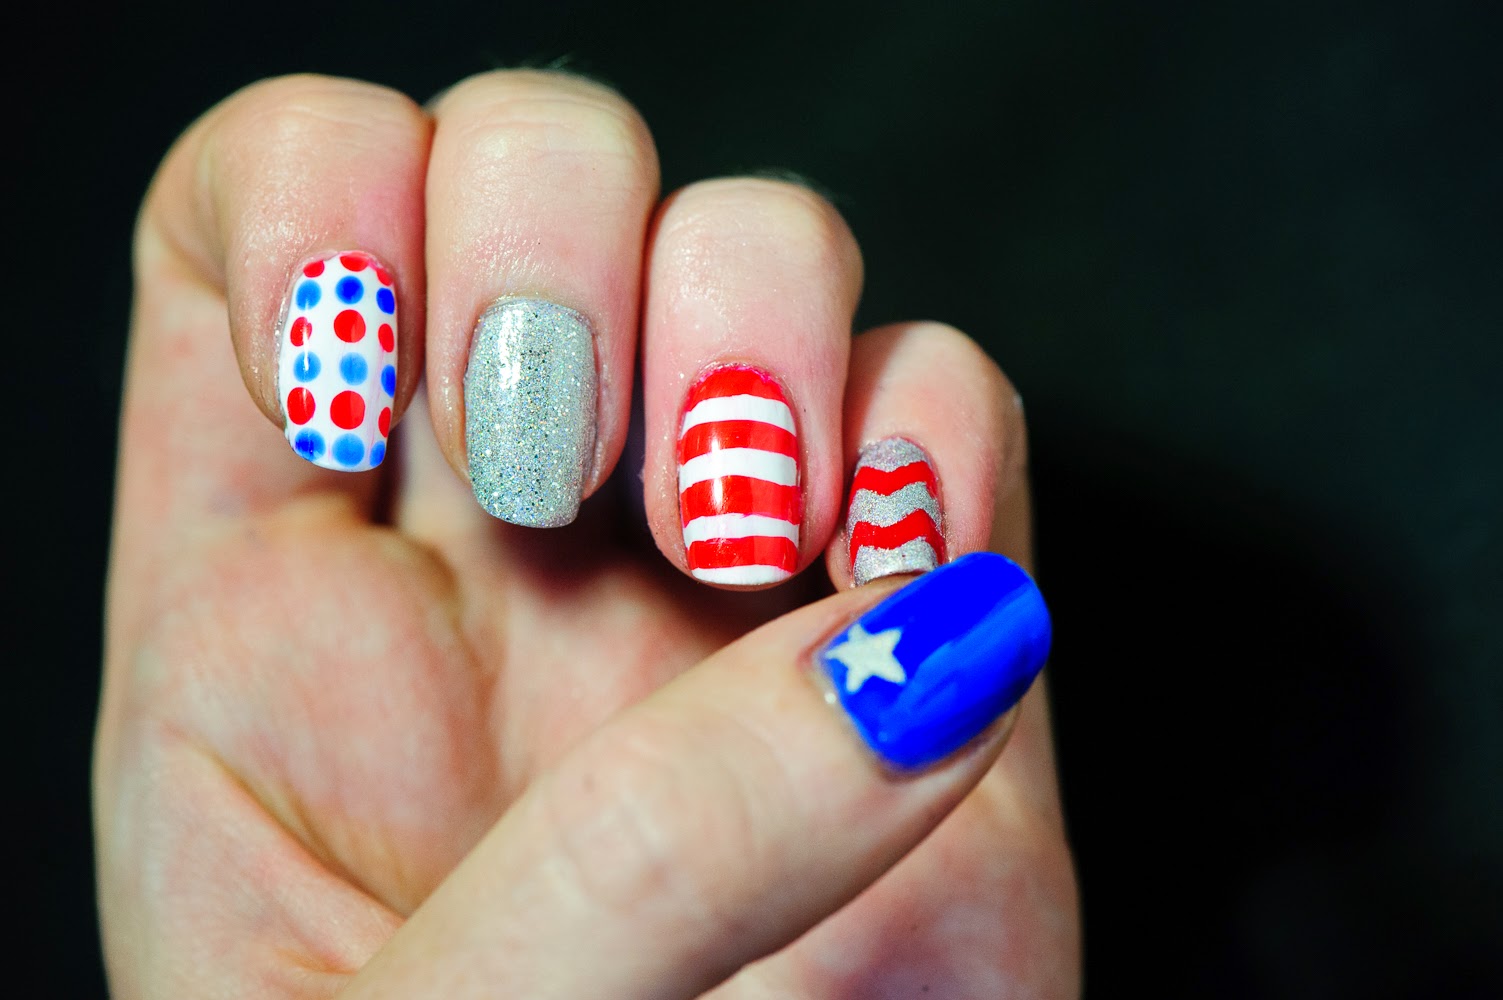
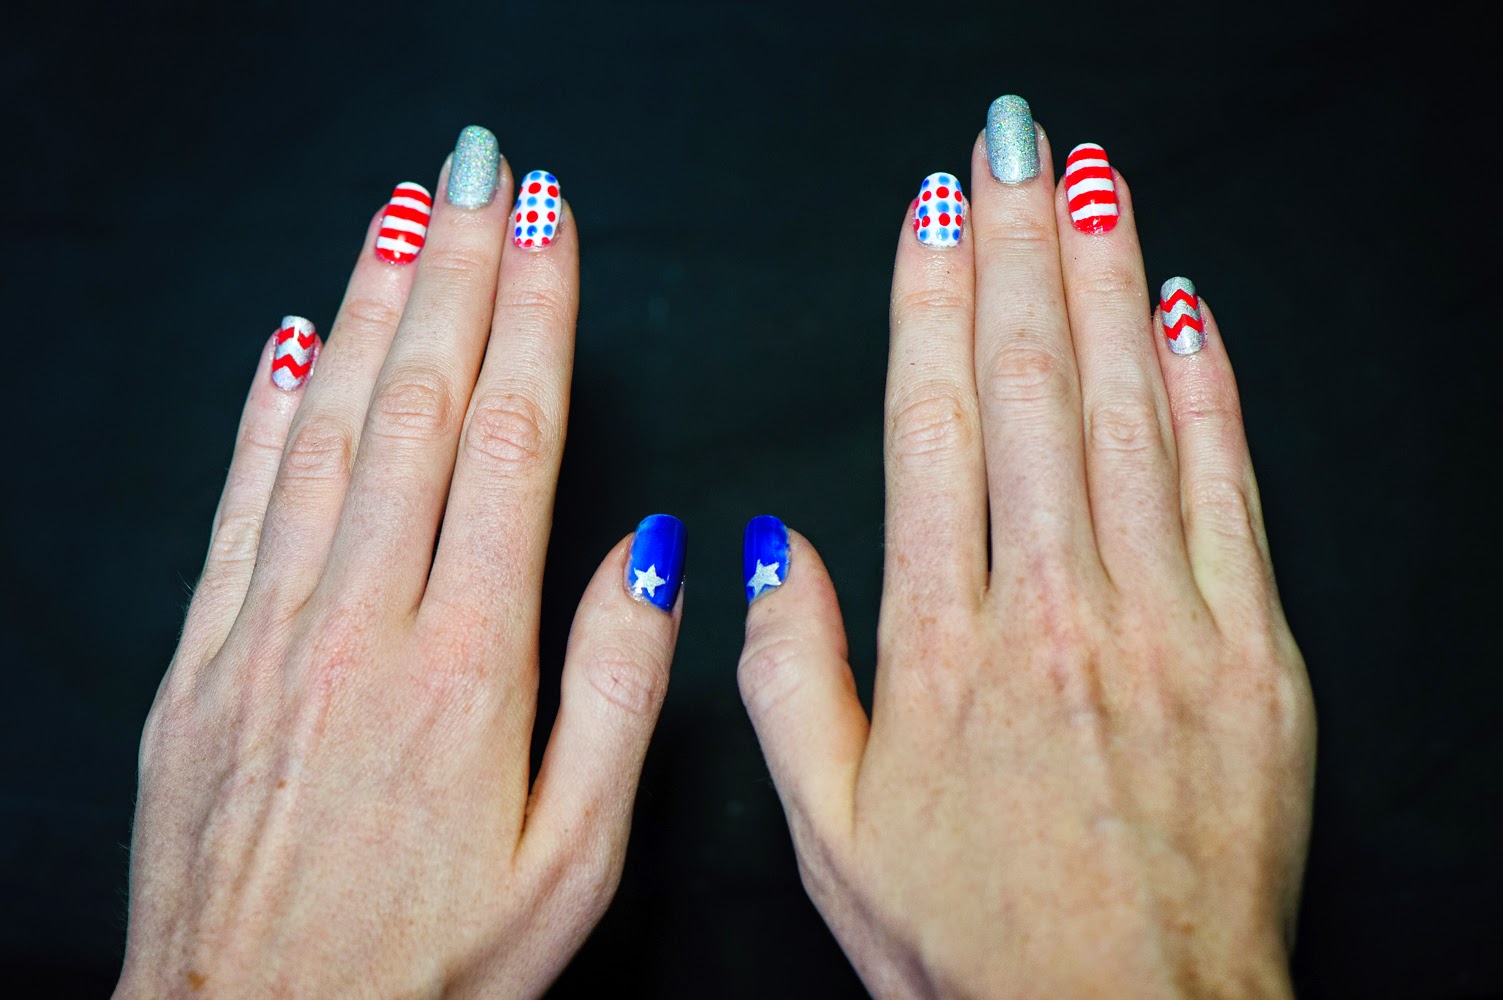
Fingers:
This is where I went crazy. I painted the thumbs with the blue polish (Bailey), the pointer and ring finger with the white polish (Brigitte), the middle finger with the silver polish (Rebel), and the pinky finger with the red polish (Jackie.) After it was all dry, I added silver stars to the thumbs using my striping brush. I used the dotting tool to make red and blue dots on my pointer fingers. I added a coat of the sparkly silver (Joelle) on top of the silver on my middle fingers. For the ring fingers, I used my striping brush to make wide stripes with the red polish. And finally, after sticking the chevron stickers to my skin a few times to make it less sticky, I applied them to my pinky fingers and then painted over it with the silver polish. I removed the stickers right away before it had a chance to dry. After that I added top coats (Essie No Chips Ahead followed by Essie Good To Go) and I was done!
This manicure isn't too hard if you have the patience for it. I hope you enjoyed this tutorial. Feel free to show me your 4th of July nail polish!


No comments:
Post a Comment